You Pick What to Set
Each setting in a profile is either Set by Your Organisation or Left to each device. Devices keep their own value for anything you leave alone.
For Company Administrators
Set your company details, report wording and required sections once in your B2B Account. Every device that follows the profile picks them up, so each surveyor starts with the same set-up.
You choose which settings your organisation controls. Everything else stays with each surveyor. You can also give every device your AI and weather keys, and fix each device’s surveyor name and accreditations.
Each setting in a profile is either Set by Your Organisation or Left to each device. Devices keep their own value for anything you leave alone.
A device follows the profile that names it, otherwise the All Devices profile, otherwise none. An account has one All Devices profile, and a device can be in one profile only.
Surveyor email addresses, signatures and email server details never travel in a profile. Each surveyor enters those on their own device. Names and accreditations are assigned per device only if you choose to.
Devices apply a saved profile the next time the app opens or checks in, and an open app checks for changes regularly. Each saved version is applied once, so a surveyor can still change an unlocked setting until you save the profile again. To stop that, lock settings.
B2B Account
Sign in to your B2B Account, open your organisation and choose App Settings. Staff with a view-only role can see profiles but not change them.
Choose New Profile. Give it a name, such as All Devices or North Team. Under Applies To, pick All Devices (including devices activated later) or Chosen Devices and tick the ones you want.
If one device is already set up the way you want, export its settings in the app from Settings → Profile → Settings Profile → Export. Then upload that .json file under Start From a Device’s Settings. Its settings fill in the profile for you to check.
Open each group, such as Company Details, Report Sections or Report Text. Tick Set by Your Organisation beside each setting you want to control, then fill it in. Untick it to leave that setting to each device.
Choose Save Profile. The list under Which Profile Each Device Follows shows which devices will pick it up.
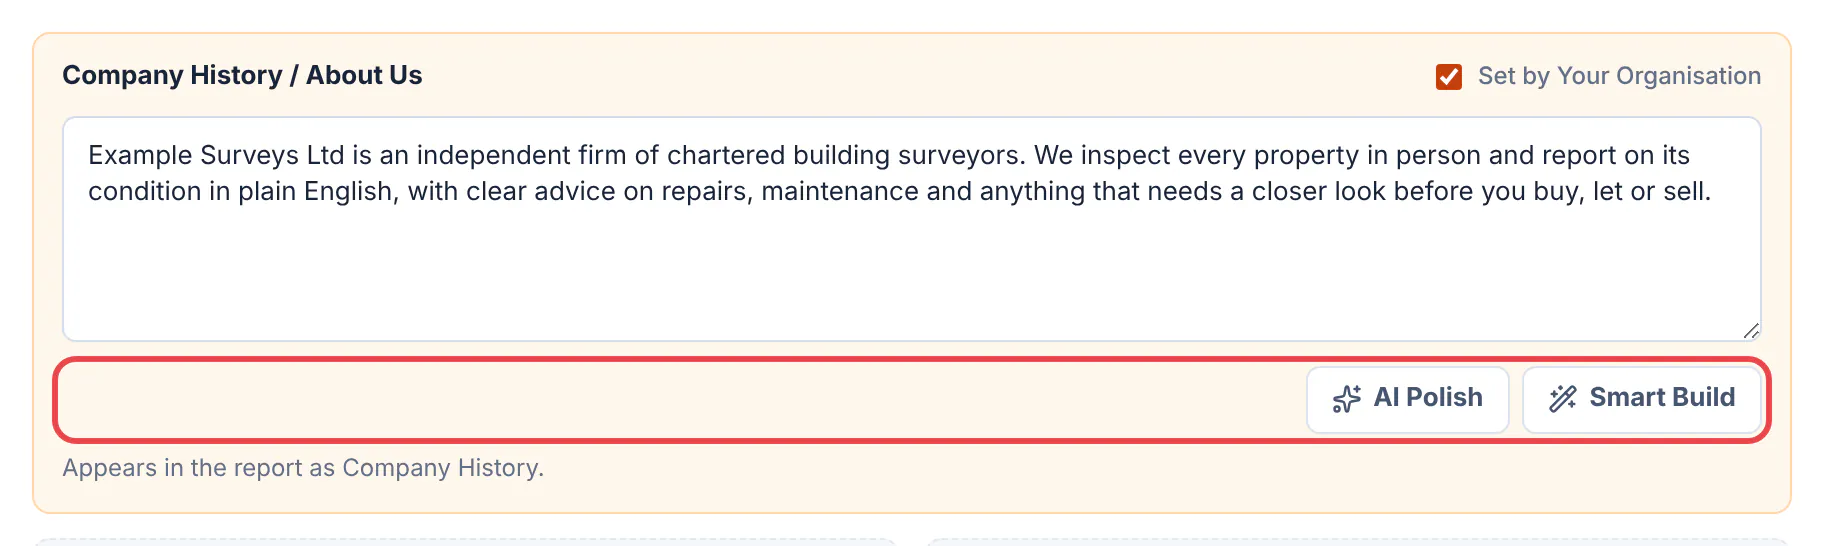
The same writing tools as the app sit under Company History / About Us, Legal Disclaimer, Independent Surveyor Disclaimer, Client Sign-Off Statement and each Default Report Wording section. They appear once you tick Set by Your Organisation for that box.
Opens the same choices as Smart Build in the app. Tick the options that describe your company or the section, read the preview, then choose Use This Text. If the profile sets a Region, the wording follows it.
Type rough notes or paste your current wording, then choose AI Polish. It rewrites the box in clear, professional report English. Each administrator has a daily AI Polish allowance in the portal, and each run takes up to 12,000 characters.
 (opens full size in a new tab)
In the profile’s Client Sign-Off group, tick Set by Your Organisation and turn it on to add a step where the tenant, landlord, client or site contact signs on the surveyor’s device, just before the surveyor’s own sign-off. Choose Who Usually Signs and write the Client Sign-Off Statement they sign under, with Smart Build and AI Polish. The report prints the statement, the signature, their name and role, and when they signed. It needs version 1.7.3 or later on each device. See Client sign-off for how surveyors use it.
Set your keys once for the whole organisation, then give a profile or a single device different ones where you need to. Each place has the same boxes: the AI Provider, a Google Gemini or OpenAI key, the OpenAI Model, and two OpenWeatherMap keys, one for live weather and one (Maps 2.0) for radar and cloud overlays. Leave OpenAI Model empty for Automatic, or enter the model ID OpenAI lists. Usage is billed to your own Google, OpenAI or OpenWeatherMap account.
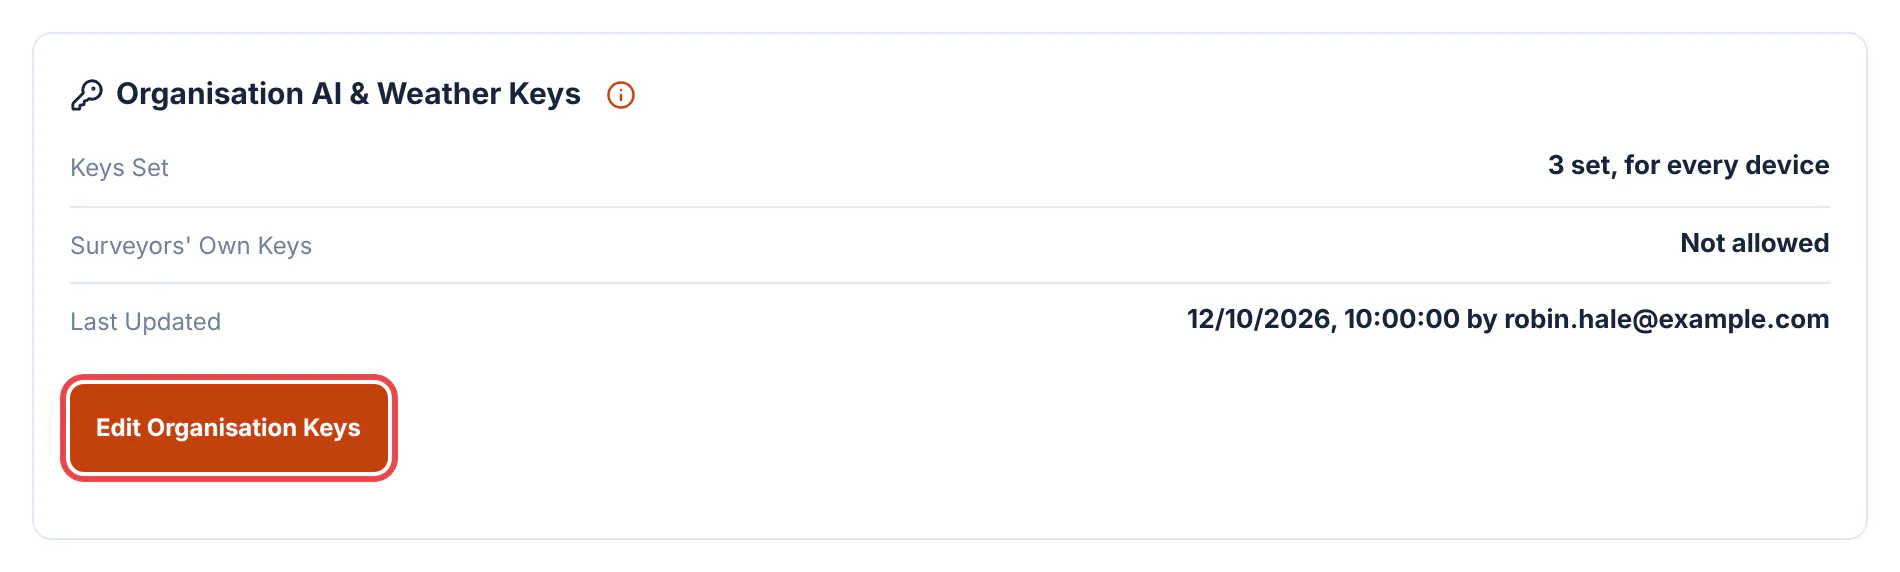
In App Settings, choose Edit Organisation Keys under Organisation AI & Weather Keys, add your keys and choose Save Keys. Every device in the account uses them, whichever profile it follows.
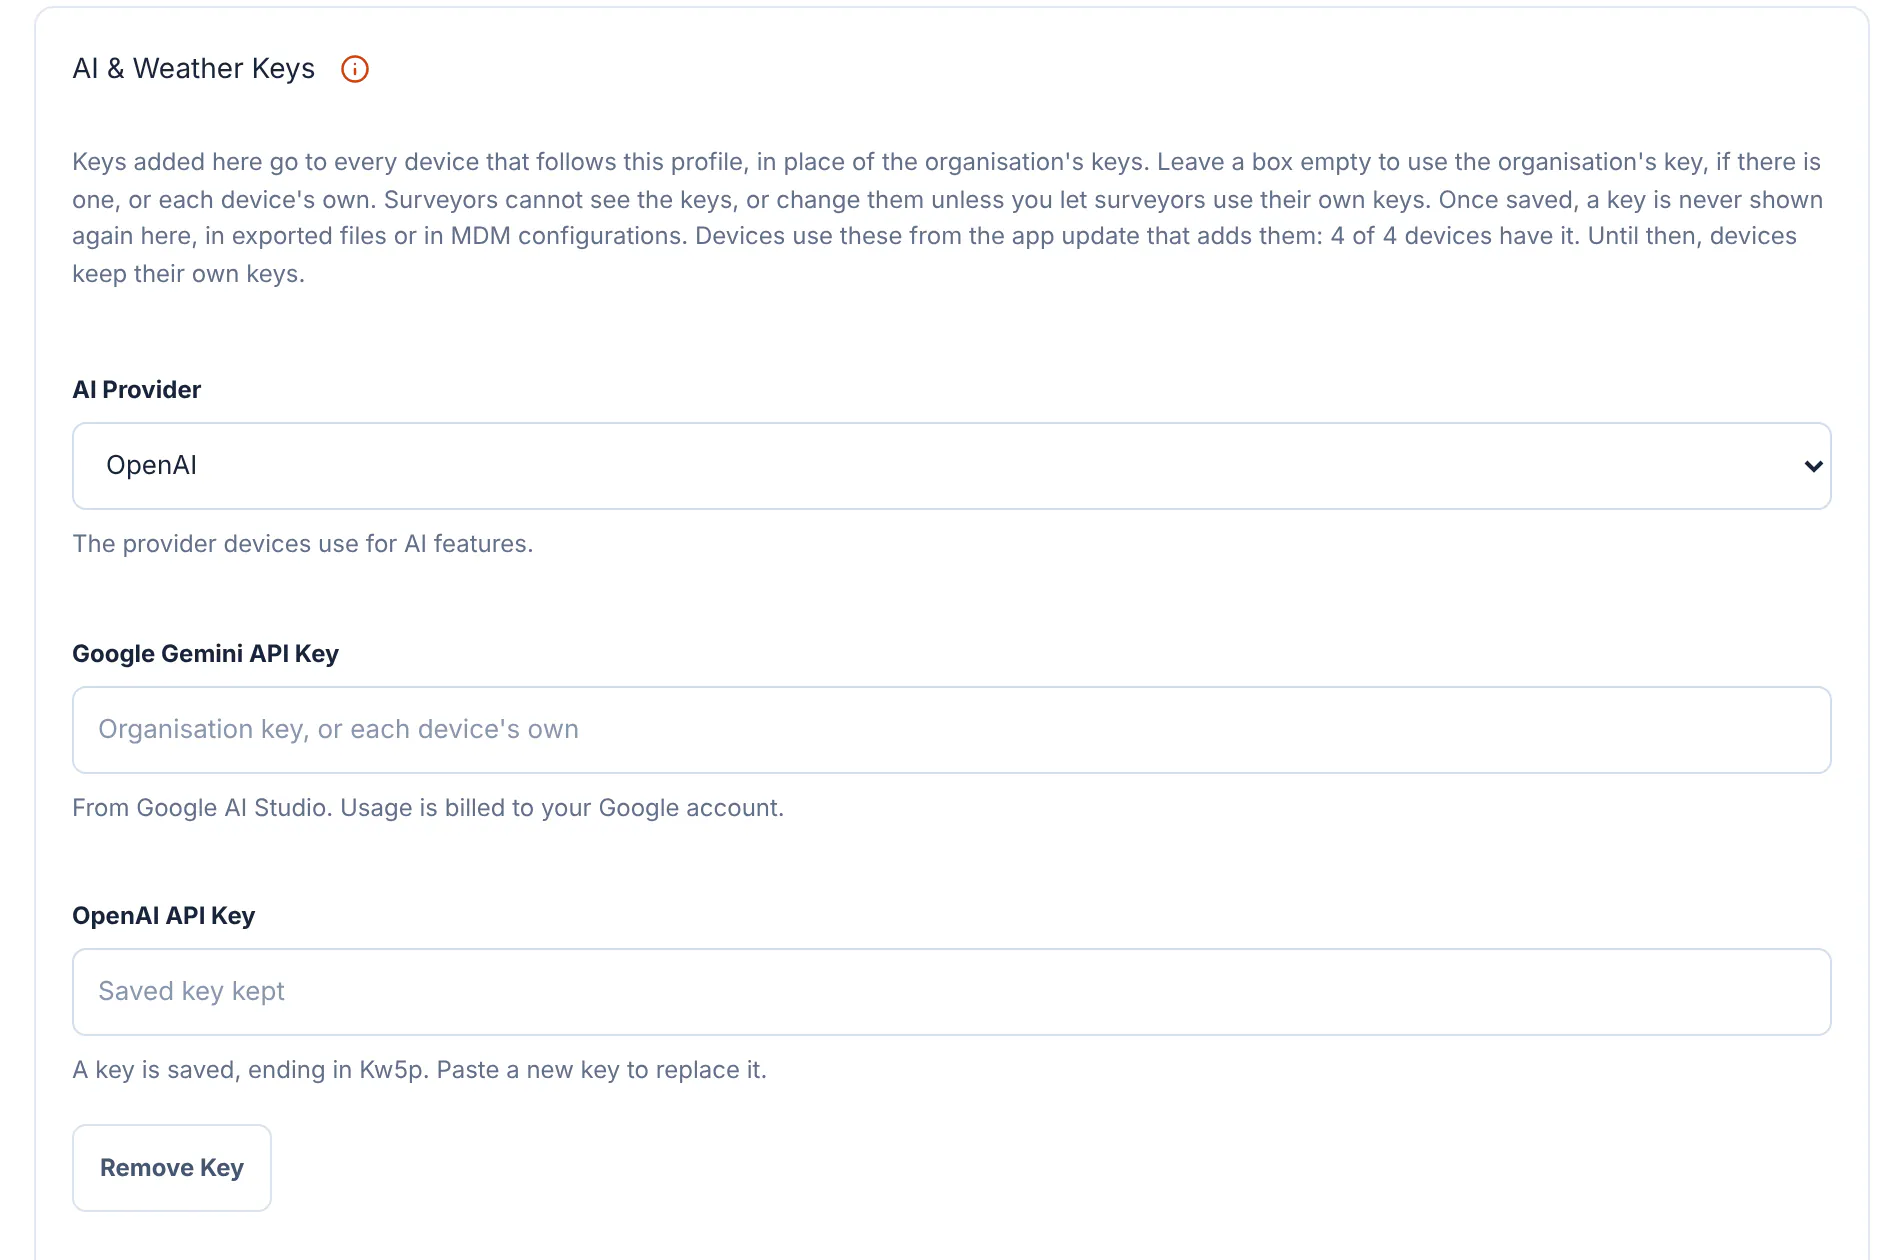
Fill in the profile’s AI & Weather Keys panel. Devices that follow the profile use these in place of the organisation’s.
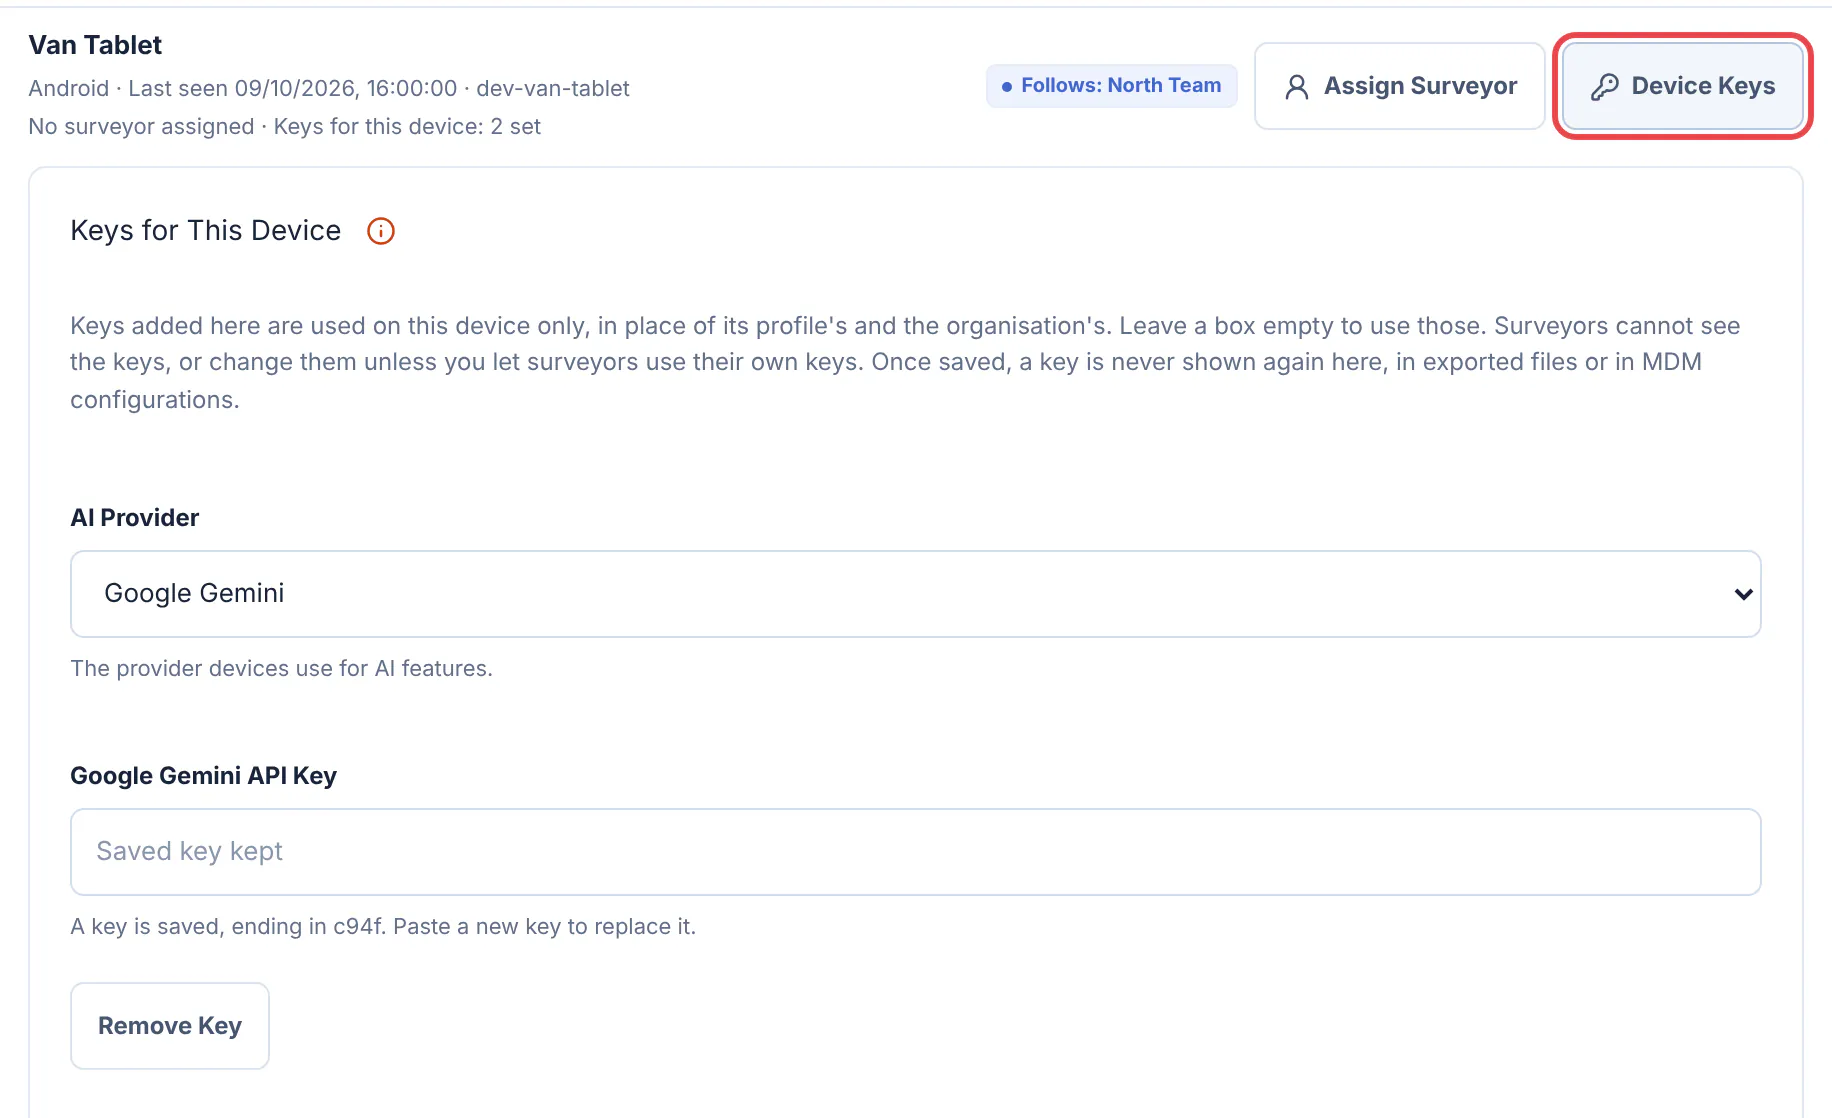
Choose Device Keys beside the device under Which Profile Each Device Follows, then Save Device Keys. That device uses these ahead of its profile’s and the organisation’s.
 (opens full size in a new tab)
 (opens full size in a new tab)
 (opens full size in a new tab)
Each key, the AI provider and the OpenAI model are looked up on their own, so a device can take its Gemini key from its profile and its weather key from the organisation. The first of these that sets one wins:
Anything none of them sets is left to the surveyor. The (i) beside each keys heading in the portal shows the same order.
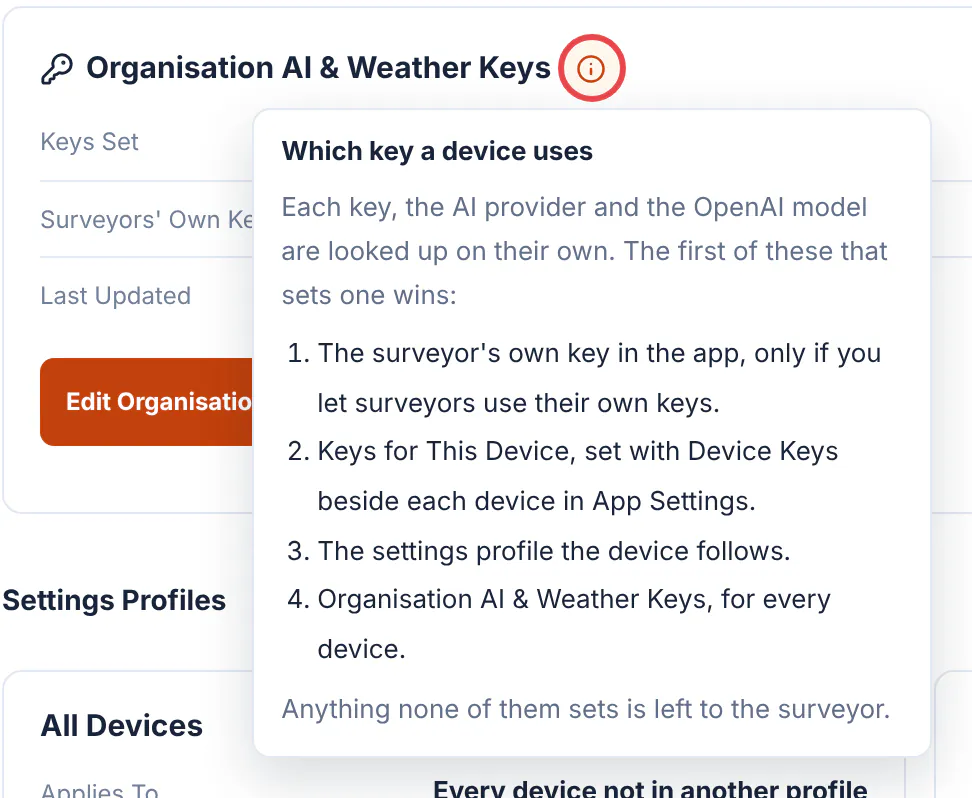 (opens full size in a new tab)
Devices use your keys in place of their own. Settings shows Set by your organisation instead of the key, and surveyors can’t see or change it. To let surveyors use a key of their own instead, tick Let surveyors use their own keys instead in Organisation AI & Weather Keys. A key a surveyor adds in Settings is then used on their device, and clearing it goes back to yours. Your keys stay hidden either way.
Once saved, the portal shows only that a key is set and its last four characters. Keys are never included in exported profile files, MDM configurations or the activity log. Paste a new key to replace one, or choose Remove Key: devices then use the next key in the order above, or their own.
Keys reach devices running version 1.7.3 or later of the PropertySurvey Pro B2B app, at their next check-in. The keys panels say how many of your devices have it.
Open Devices and choose a device, or choose Assign Surveyor beside it under Which Profile Each Device Follows in App Settings. Enter the surveyor’s First Name, Last Name and Accreditations / Titles, such as RICS, RPSA, then choose Save Surveyor.
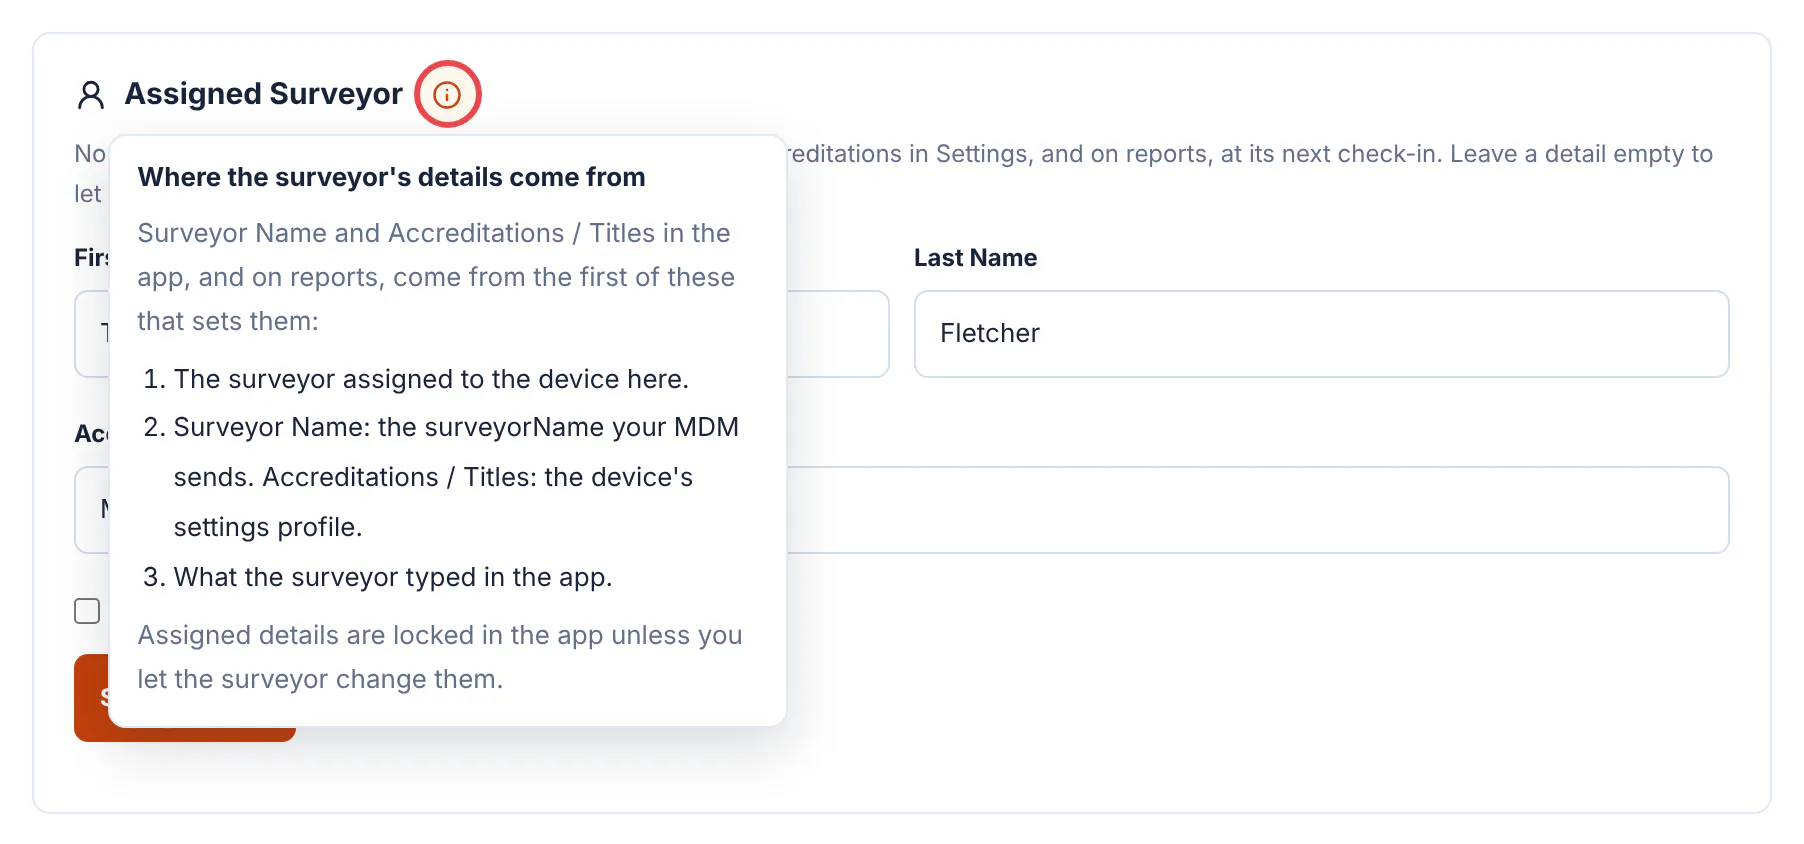 (opens full size in a new tab)
At its next check-in the app fills in Surveyor Name and Accreditations / Titles in Settings and on reports, and the surveyor can’t change them. Tick Let the surveyor change these in the app to fill them in once and let the surveyor correct them.
Leave a detail empty to let the surveyor enter their own. Remove Surveyor keeps the details on the device and unlocks them. A surveyor assigned here takes priority over a name from your MDM.
Surveyor Name and Accreditations / Titles come from the first of these that sets them:
surveyorName your MDM sends. For accreditations, the device’s settings profile.Assigned surveyors reach devices running version 1.7.3 or later. Devices on an older version are marked Needs the app update.
In the profile’s Lock panel, tick Lock Settings on Devices and choose a 4 to 8 digit PIN. Surveyors then need the PIN to change settings on a device that follows the profile. The portal never shows a saved PIN again, so keep it somewhere safe. To change it, type a New PIN and save.
A lock on a profile with no settings set keeps each device’s own settings as they are.
Under Report Sections, set Required Sections and tick the sections every report needs, such as the sign-off. Share, Email and Print stay blocked until each one is filled in, and the app lists any that are still empty. A hidden section can’t be required.
If you remove a profile, its devices keep their current settings and the lock it set is lifted.
Managed Devices
If you manage devices with Intune, Jamf Pro, Kandji, Workspace ONE, Google Workspace or another MDM, you can deliver a profile with the activation code. A profile saved in the portal takes priority on a device that follows one.
Create the profile as above. Only profiles with at least one setting can be added to an MDM configuration.
Go to Activation Codes → QR & Setup Pack → MDM Configuration. Choose Your MDM Platform and Your Devices.
Tick Include an App Settings Profile and choose the profile. If the profile locks settings, enter the same Settings PIN you saved, because the portal can’t read it back.
Pick the Configuration File Format your console expects, then choose Download File or Copy Configuration. Add it as managed app configuration for the B2B app, assigned to the same devices as the app.
| Key | Type | Value |
|---|---|---|
activationCode | String | The activation code from your private setup pack. |
settingsProfile | String | Optional. The profile as one line of JSON text, from the portal’s download. The logo is left out to keep it small; devices that follow a portal profile get the logo from there. AI and weather keys never travel in it. |
surveyorName | String | Optional, version 1.7.3 or later. The surveyor’s full name, usually your MDM’s variable for the assigned user’s name. A surveyor assigned in the portal takes priority. |
surveyorNameLocked | Boolean | Optional. true stops surveyors changing the name. |
These show the shape only. Use the portal’s download for your real values: never type an activation code or PIN into a public document.
iPhone and iPad (app configuration dictionary for Intune, Jamf Pro, Kandji or Workspace ONE):
<dict>
  <key>activationCode</key>
  <string>YOUR-ACTIVATION-CODE</string>
  <key>settingsProfile</key>
  <string>{"format":"prosurvey-settings-profile","version":1,"app":"propertysurvey-pro","settings":{"requiredSections":["section_exec_summary","section_sign_off"]}}</string>
</dict>
Android (managed configuration, for consoles that accept JSON):
{
  "activationCode": "YOUR-ACTIVATION-CODE",
  "settingsProfile": "{\"format\":\"prosurvey-settings-profile\",\"version\":1,\"app\":\"propertysurvey-pro\",\"settings\":{\"requiredSections\":[\"section_exec_summary\",\"section_sign_off\"]}}"
}
Android Management API (an applications entry to merge into an existing policy):
{
  "applications": [
    {
      "packageName": "com.propertysurvey.pro.b2b",
      "managedConfiguration": {
        "activationCode": "YOUR-ACTIVATION-CODE",
        "settingsProfile": "{\"format\":\"prosurvey-settings-profile\",\"version\":1,\"app\":\"propertysurvey-pro\",\"settings\":{\"requiredSections\":[\"section_exec_summary\",\"section_sign_off\"]}}"
      }
    }
  ]
}
An MDM download is a snapshot. It does not change when you edit the profile, replace a code or change the PIN, so download it again and update your console after any change. Keep downloaded files private: they hold a reusable activation code, and the PIN when the profile is locked. Step-by-step console guides are in the platform guides.
Field Surveyors
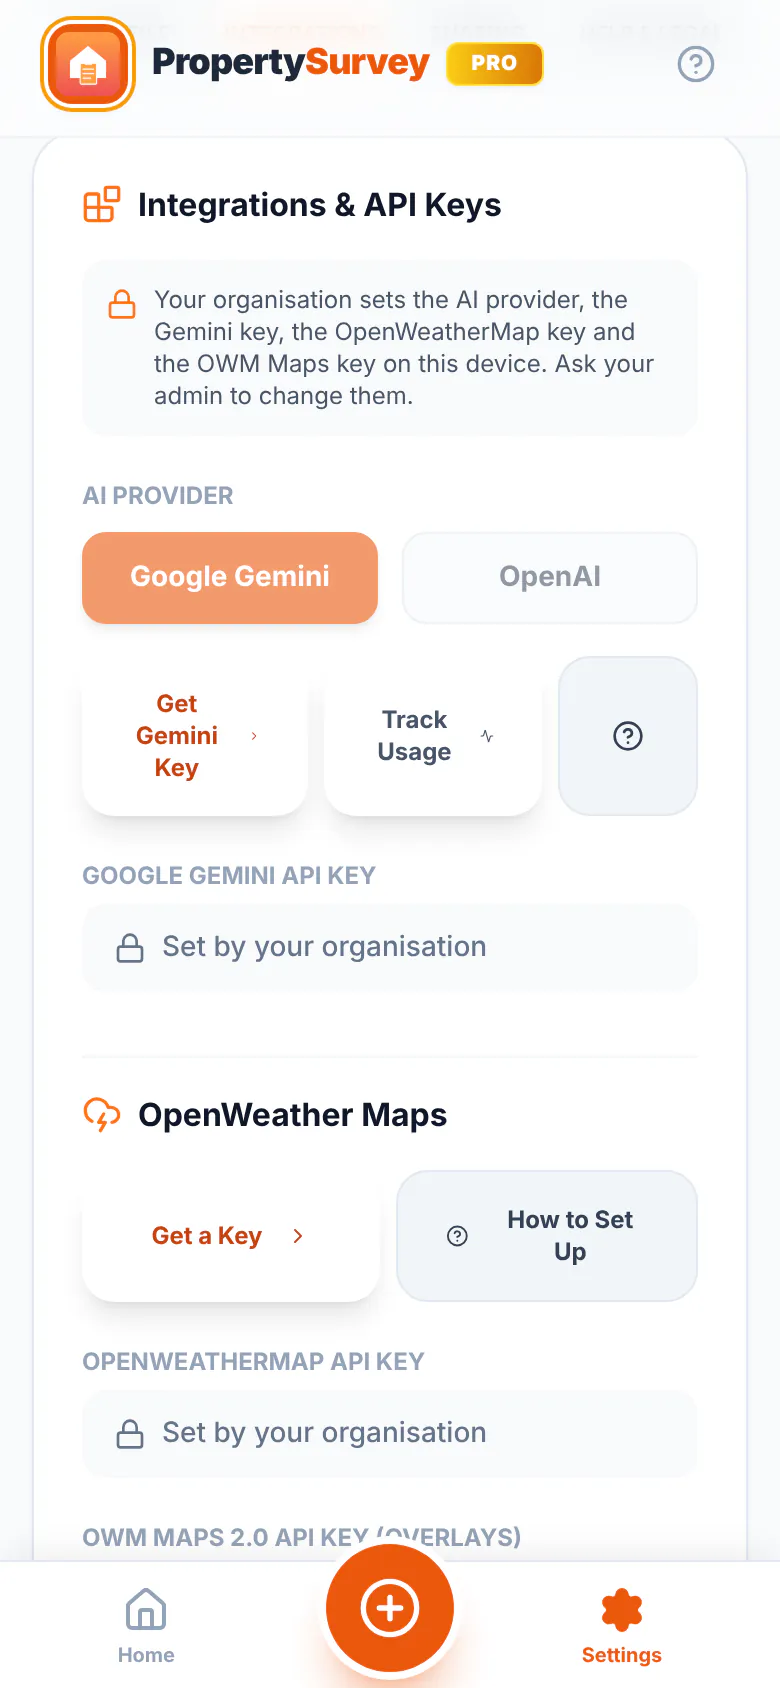
Profiles reach devices running the current version of the PropertySurvey Pro B2B app. If a surveyor’s device seems out of date, ask them to update the app and open it while online.
Check Which Profile Each Device Follows in App Settings to confirm the device is in the profile you expect. Then ask the surveyor to open the app while online. Make sure the app is up to date and the device is still active in Devices.
Tick Set by Your Organisation for that box first. Smart Build only appears on boxes the app has a builder for, and view-only staff don’t see either tool.
The daily AI Polish allowance for your sign-in has run out. Try again tomorrow, or type the wording yourself.
Refresh the page and sign in again if asked, then try again. If it keeps failing, contact support with the time it happened.
Yes, from version 1.7.3. Choose Assign Surveyor for the device in Devices or App Settings, enter the name and accreditations, and save. The device fills them in at its next check-in.
No. Devices use the keys but show only that your organisation set them, and the portal never shows a saved key again. Replace or remove a key where you set it: Organisation AI & Weather Keys, the profile or Device Keys.
A key set with Device Keys comes first, then the profile the device follows, then Organisation AI & Weather Keys. If you let surveyors use their own keys, a key the surveyor added in the app comes before all of them. Check each in that order, and ask the surveyor to open the app while online.
Yes, if you tick Let surveyors use their own keys instead in Organisation AI & Weather Keys. Devices on version 1.7.3 or later then use a key the surveyor adds in Settings in place of yours, and go back to yours if they clear it.
A device that follows a portal profile uses the portal profile. The MDM’s settingsProfile is used only when no portal profile applies to that device.
Open the profile, type a New PIN and save. Devices take the new PIN the next time the app opens or checks in. Never send a PIN in the same message as the activation code.
Guidance checked 12 October 2026.
Open your B2B Account to create your first profile. Start with one or two devices, check them, then add the rest.